| Build-A-Board®: for Windows; The Next Generation of Onscreen Keyboards; Version 2.20 Release 6; User's Guide | ||
|---|---|---|
| Prev | Chapter 4. Building Boards & Reference | Next |
The process of building boards is fairly straightforward - start with an existing sample, or start from an empty board. Add keys and modify keys as necessary to meet your requirements. Build & Test to work with keyboard layout. Finally, deploy on target systems.
An iterative design/build/modify/build process is the most effective, as a large part of the actual use involves humans - no matter how well you think it through, actually letting users operate with a built board will often provide important information as to what additional changes are necessary.
Build Process Overview
The Build process within the Builder transforms the source files into a single file KBF (KeyBoard File) that contains all layout, key, label, action, image, and run-time option information. Each Build process builds for the currently selected Target.

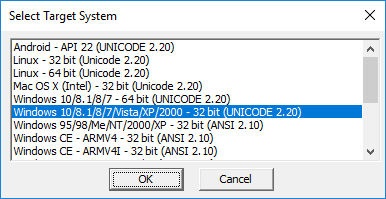
Note: The currently selected Target can affect features and capabilities within the Builder. For example, when working on pre 1.80 KBF files, ANSI 2.10 KBF targets, or Unicode 2.20 KBF targets, different Key properties will be available.
IMPORTANT NOTE: For older projects, and projects that target ANSI 2.10 that will continue to target 2.10 targets, you should not select UNICODE targets, or convert to 2.20 in the File menu, as projects targeting UNICODE 2.20 cannot be converted back to ANSI 2.10 (there is no mechanism, as data loss is likely).
Once built, results will be placed in a folder in the TARGET folder - See Global Settings. This Sub-folder will be named after the Project name in use. As each Target is built, a sub-folder under the Project name containing the Run-Time Target Program, and KBF Data will be created / updated. In all builds, there will be a TEST sub-folder created / updated that contains a Windows run-time version and the currently build KBF, so the layout can be quickly and easily tested from withing the Builder (F10, Build Menu | Run). The last built KBF will be created in the Project name folder.
For each build, the KBF will always be saved as 2 distinct files - 1 named KEYBOARD.KBF, and 1 named as [Project Name].KBF (e.g. MyProject.KBF). The KEYBOARD.KBF is always created, as this is the default layout displayed if no other option is used when running My-T-Soft. When multiple layouts are integrated, having these distinct names resolves naming conflicts, while the KEYBOARD.KBF is the "as first displayed when run" layout (i.e. Default layout).
Board Tools
When building layouts, the Grid tools, and Layout / Alignment tools are the most helpful in providing capabilities to build well-organized layouts. See Panel Display and Cursor Tools and Menus & Settings.
Add Keys
Add New Key (Right-click | Add New Button, Edit | Add New Key, Insert key, Add Tool, click & drag on empty board area, drag & drop from Keys window (F8)). For additional information, see working with the Panel Display.
Move & Size Keys
Click & Drag - Key area, moves key; frames, resizes key
Arrow keys - Move Key; with Ctrl & Shift, resizes frames
See Panel Display and Cursor Tools and Menus & Settings.
Modify Keys
Key area (Double-click, Right-click | Properties). See Key Properties for details.
Build & Execute
Build Board (Build menu | Build, Tool bar | Build, F9 key).
Execute My-T-Soft with Board layout from with Builder for testing (TARGET TEST Folder) (Build | Execute, Tool bar | Run, F10 key).
Typical Approach / Final Notes
Typically the board is modified, built, and then tested from within the Builder in an iterative process, up until the developer/user feels it is ready to deploy and test in its final/target environment. See the next section Run-Time Options for deployment and target options.
As seen in ...
